This is a simple tutorial where you can learn how to translate your WordPress pages with WPML plugin.
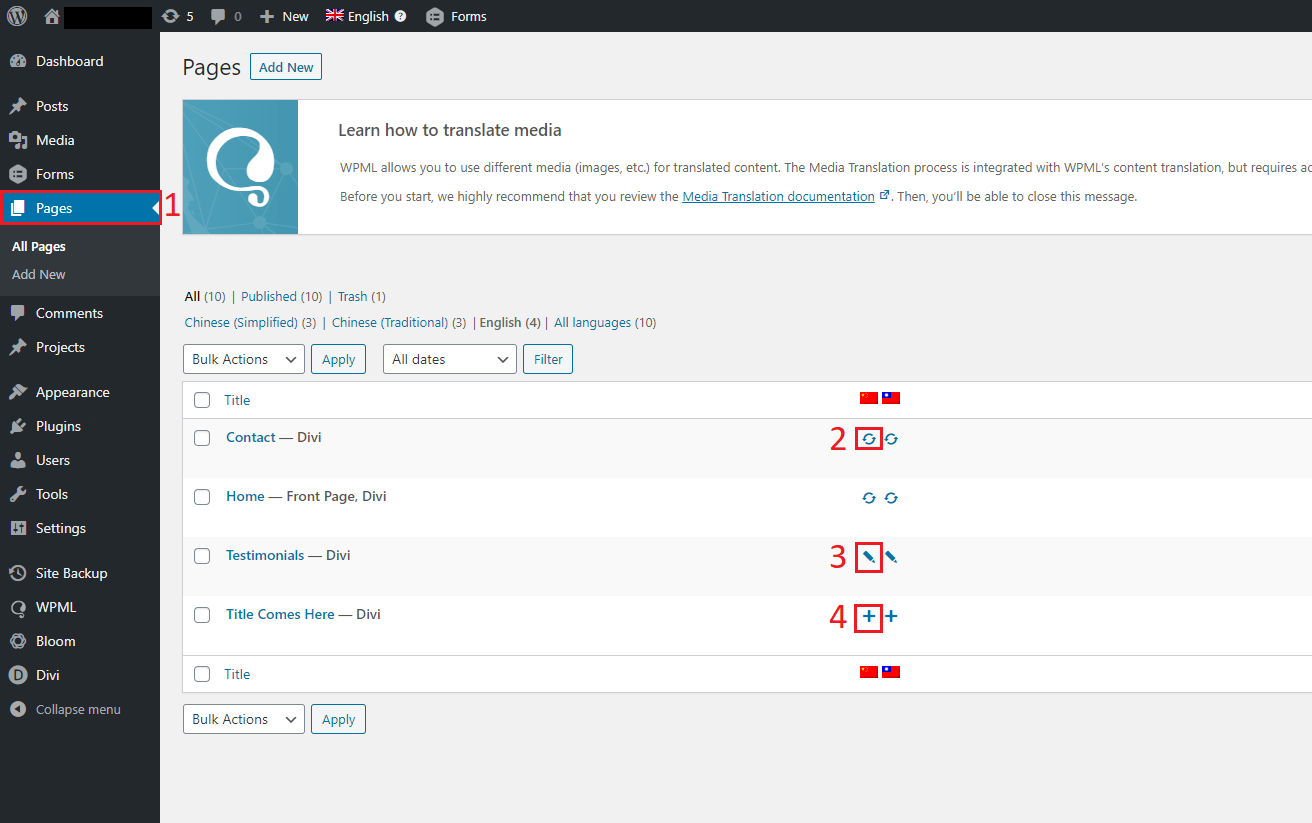
First of all, log in into your WordPress and go to the pages panel (screenshot #1, mark 1).
Once you are there you will see all your pages and a column on the right with various symbols (screenshot #1, marks 2, 3 and 4).
In this case, we have 2 icons per page because we configured the website to be translated from English to Simplified & Traditional Chinese. You can click on the one you need to make any modification. We will click on the icon marked “4”. It is a sample page and does contain any translation yet.
To avoid duplicated pages, always add or edit the translations from the English pages, which contain the base structure of your pages.
Screenshot #1
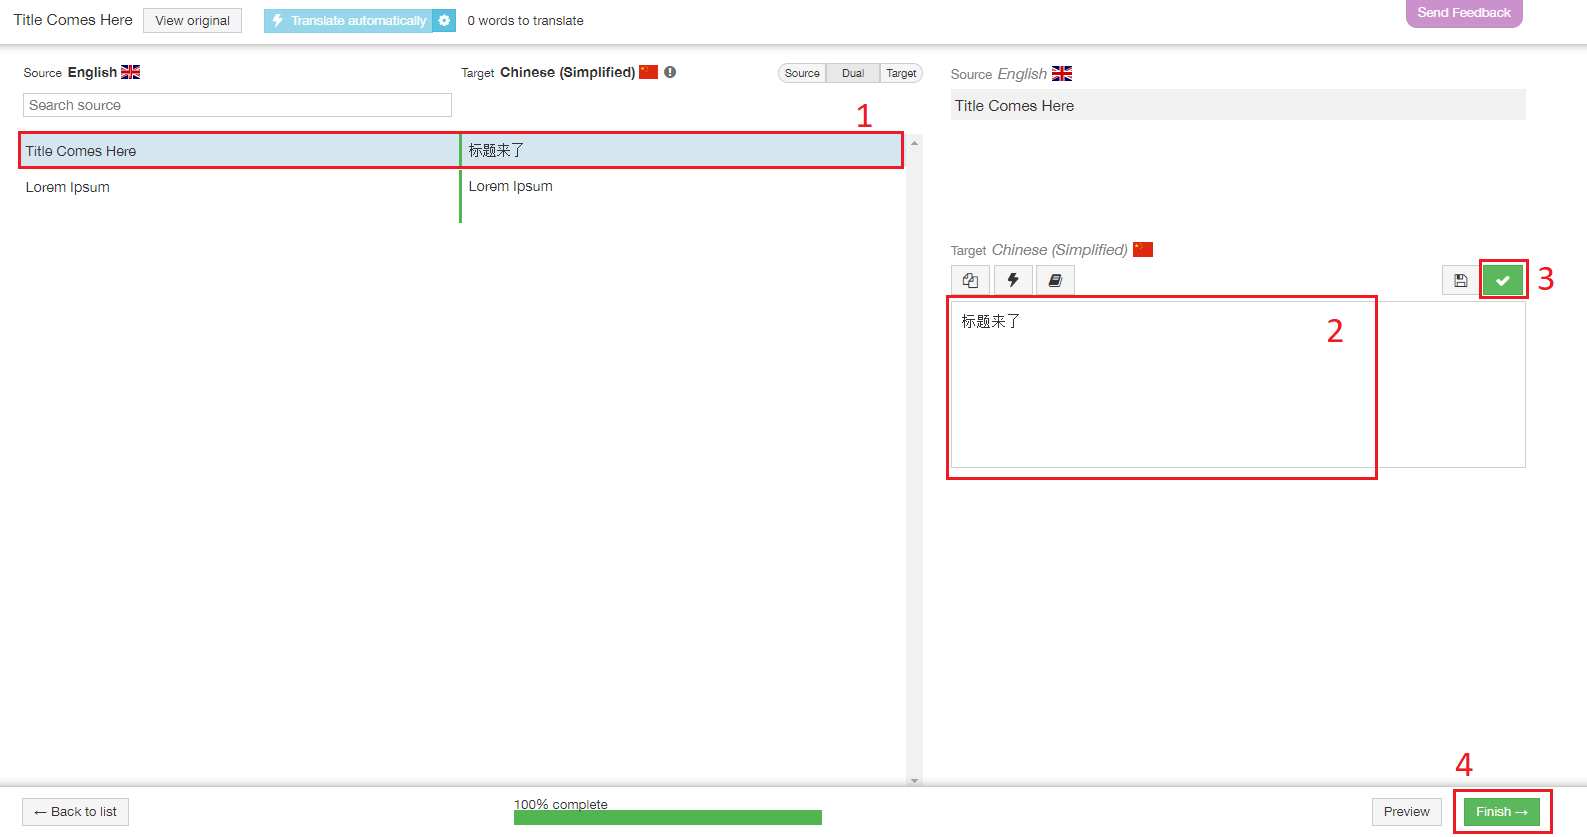
When you click on any of these icons, you will be redirected to the “Advanced Translation Editor” (screenshot #2).
This is where you must add the translation for each sentence/paragraph in you page (see screenshot #2, mark 1).
Add the translation into the text box (screenshot #2, mark 2) and click on the green check mark (screenshot #2, mark 3) once you finish. It will automatically jump to the next sentence you need to translate. You always can revert to any previous sentence by clicking on any sentence on the left, which will allow you to modify your translation.
Once you finish the translations you must click on the green “Finish” button (screenshot #2, mark 4).
Screenshot #2
When you finish the translation, you will be redirected to a summary page, to finalize this process click on the button “Complete” (screenshot #3, mark 1). It will redirect you to the main pages panel in WordPress.
Now you can go to visualize your page translated! ?
Screenshot #3
If you want learn more about WPML you can click here
Regards from Industry Rockstar Done for You Team ?


